Tuesday, October 28, 2014

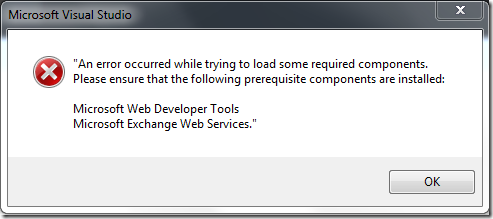
An error occurred whilst trying to load some required components, Please ensure the following prerequisite components are installed. Microsoft Web Developer Tools Microsoft Exchange Web Services”

Visual Studio 2012 provides a great environment for dev/test SharePoint 2013 Apps.
This is true both for scenarios where you want to dev/test in the cloud and then run the app in the cloud, as well as for scenarios where you want to dev/test in the cloud and then run the app using an existing on-premises environment.
If you want to create a SharePoint 2013 app and your receive the following exception, follow the next step by step guide to resolve this issue.


ewserror
  1. Close the messagebox and Visual Studio.
  2. Type appwiz.cpl in Run, this will open the Add/Remove Programs control window.
  3. Uninstall Microsoft Exchange Web Services Managed API 2.0
  4. Right click the EwsManagedApi32.msi link and use the Save link as option to store the msi in c:\downloads
  5. Navigate to c:\downloads and type cmd in the adres bar (this will open the command prompt with c:\downloads as location)


  1. Type dir and make sure EwsManagedApi32.msi is listed in the console window
  2. Type EwsManagedApi32.msi addlocal=”ExchangeWebServicesApi_Feature,ExchangeWebServicesApi_Gac”
  3. complete the installation procedure
  4. Open Visual Studio 2012 and start a new SharePoint 2013 App project.


Ref :


http://blogs.msdn.com/b/timquin/archive/2013/01/22/setting-up-visual-studio-2012-for-sharepoint-2013-development-offline.aspx


 http://leonzandman.com/2013/02/07/prerequisite-components-error-when-creating-a-visual-studio-2012-sharepoint-2013-app-project/


http://tomvangaever.be/blogv2/2013/06/an-error-occurred-whilst-trying-to-load-some-required-components-please-ensure-the-following-prerequisite-components-are-installed-microsoft-web-developer-tools-microsoft-exchange-web-services/

Monday, October 27, 2014

CSV File to Excel XLS


Open the CSV File
When you select the option to open a file in Excel, you will see the option Text Files that includes CSV files. The CSV file has an icon indicating that it is supported by Excel. This is the fastest method and the default action when you double click on a CSV file, although it does not work with all CSV files.

excel2010-file-open-csv
Open file in Excel 2010
excel2010-open-dialog-csv
Open file of CSV type in Excel 2010
Depending on the CSV file contents and the regional settings configuration of Windows, the data in the CSV file may not show correctly in Excel. The most common errors are:
- data is shown on a single column
- date columns are shown as text
- text columns containing only numbers are treated as number with leading zero removed
- currency values treated as text
Download the file advanced-csv-sample.csv to reproduce some of these errors.
excel2010-csv-format-error
CSV data incorrectly formatted: Order ID without leading zeroes and Order Date and EUR Amount as text instead of date and number
Open the CSV file in Notepad and notice that the leading zeroes in the Order ID field were removed by Excel. The Order Date value in the date format YYYYMMDD (year, month and day) wasn’t automatically recognized. Neither was the Amount in EUR value because this computer is configured to use period as decimal symbol. Both values appear as text instead of their correct formats, limiting the use of the data.
Use the Text Import Tool described below to mitigate these errors.
Import CSV File using Excel Text Import Tool
Click the Data tab on the Excel ribbon, then click the Get External Data option and select From Text on the popup menu, as shown below:
excel2010-get-external-data-text
Get External Data From Text function on Data tab
Select the CSV file to import with the Import Text File dialog and click Import button:
excel2010-external-data-open-csv
Use Import Text File dialog to open CSV file
Define the import settings (step 1 of 3). The contents of the file are shown, notice the use of comma to separate values and double quotes enclosing the EUR amount value because it contains a comma. Keep the data type as delimited to configure the delimiter in the next screen. You may need to change the File Origin to Windows (ANSI) depending on the file contents. Change it only if you notice weird characters in the processed data.
excel2010-text-import-wizard-1
Configure CSV file as delimited
Define the import settings (step 2 of 3). Select the right separator, comma in this example, to show the values into columns.
excel2010-text-import-wizard-2
Configure delimiter of CSV file with data preview
Define the import settings (step 3 of 3 – part 1). Review and if necessary change the data format of each column. As the column Order Id contains only numbers Excel treats it as number and removes the leading zeros. If we change the column data format to text Excel will not change its contents.
excel2010-text-import-wizard-31
Configure data format for text value in CSV file
Define the import settings (step 3 of 3 – part 2). Excel recognizes some date formats. If it does not, change the data format manually defining one of the supported formats. In the example we change the column Order Date to the right format. YMD means that the date is in the format Year – Month – Day.
excel2010-text-import-wizard-32
Configure data format for date value in CSV file
Define the import settings (step 3 of 3 – part 3). Sometimes even number columns need to be configured. In this example the Amount EUR column is using a different decimal symbol than the system’s configuration. To configure these cases, keep the data format as General, click the Advanced button and configure the decimal and thousands separators used in the column.
excel2010-text-import-wizard-33
Configure data format for amount value in CSV file
Define the destination of the imported data. After you finish configuring the wizard, Excel opens the Import Data dialog asking where to put the results. Select the proper location but do not click the OK button yet, as there is still one step left.
excel2010-text-import-data-sheet
Import Data dialog to define where to put the imported data
Click the Properties button to define the properties of the import process, so it can be used more times without the need of reconfiguring everything:
Query Definition
Keep it checked to save the import configuration (delimiter, column formats)
Refresh Control
The refresh control defines if the sheet will be automatically refreshed, if the file name changes and if the sheet should be refreshed and emptied when opened or closed. Uncheck the “Prompt for file name on refresh” option if the file always have the same name and location.
Data formatting and layout
Normally nothing to change
If the number of rows in the data range changes upon refresh
This configuration depends on the source file, if it always contain all data use the overwrite option, the insert options will move existing data down and load the new data above it
Fill down formulas in columns adjacent to data
Check this option if the sheet contains columns with formulas alongside imported data. Its recommended to use another sheet to process the imported data.
excel2010-external-data-range
External Data Range Properties dialog to define where to put the imported data
Click OK to close the External Data Range Properties dialog and click OK to close the Import Data dialog and import the data on the selected destination. If the data is formatted correctly, save the sheet.
excel2010-csv-format-right
CSV file imported with data formatted correctly
To refresh the data, importing a new file with the same format, click on any of the cells that holds data of a previous import. Then on the Data tab, click on the Refresh All Icon or the Refresh All option on its popup menu.
excel2010-text-import-data-refresh
Refresh All function to import CSV file again and refresh data

Monday, October 20, 2014

SharePoint 2013 updates Installation with less Time


1. Disable the IISAdmin and SPTimerV4 service
2. Shut down IIS Admin and Timer Services if they are running                                                                                                            
3. Give you the option to Pause the Search Service Application (see search notes below)                                                                                      
4. Stop Search Services (see search notes below)                                                                                                                                                     
5. Install the patch in passive mode (No user interaction required but will witness the patch install in the UI)
Note:  Power Shell should remain open in the background while patch is running


6. Upon completion of the patch, the Power Shell script, services in step 1 are set to Automatic                                                                          
7. Starts up IIS Admin and Timer Services                                                                      
                                                                        
8. Starts up Search Services            
                                                                                                                                                                    9. Resume the Search Service Application if it was paused   
                                                                                                                   
10. Finally, the script will display the Start Time and End Time for patch install
 
Instructions for Running the Power Shell Script


In order to run the script, save the flow script to a text editor like notepad.   Save the file with a .ps1 extension to a folder on the SharePoint Server.   Drop the SharePoint cumulative update in the same folder as the script.   In my example, I created a scripts folder where I dropped the powershell script and the cumulative update.
For Example:


 image


Important:  Only one update should be placed here and the file extension should be .exe. 
Finally,


 to run the script from c:\scripts using SharePoint Management Shell.  This script is tested on Windows 2012 running SharePoint 2013


image


Script :


<# ==============================================================
  //
  // Microsoft provides programming examples for illustration only,
  // without warranty either expressed or implied, including, but not
// limited to, the implied warranties of merchantability and/or
  // fitness for a particular purpose.
  //
  // This sample assumes that you are familiar with the programming
  // language being demonstrated and the tools used to create and debug
  // procedures. Microsoft support professionals can help explain the
  // functionality of a particular procedure, but they will not modify
  // these examples to provide added functionality or construct
  // procedures to meet your specific needs. If you have limited
  // programming experience, you may want to contact a Microsoft
  // Certified Partner or the Microsoft fee-based consulting line at
  //  (800) 936-5200 .
  //
  // For more information about Microsoft Certified Partners, please
  // visit the following Microsoft Web site:
  // https://partner.microsoft.com/global/30000104
  //
  // Author: Russ Maxwell (russmax@microsoft.com)
  //
  // ---------------------------------------------------------- #>

###########################
##Ensure Patch is Present##
###########################
$patchfile = Get-ChildItem | where{$_.Extension -eq ".exe"}
if($patchfile -eq $null)
{
  Write-Host "Unable to retrieve the file.  Exiting Script" -ForegroundColor Red
  Return
}

########################
##Stop Search Services##
########################
##Checking Search services##
$srchctr = 1
$srch4srvctr = 1
$srch5srvctr = 1
$srv4 = get-service "OSearch15"
$srv5 = get-service "SPSearchHostController"
If(($srv4.status -eq "Running") -or ($srv5.status-eq "Running"))
  {
    Write-Host "Choose 1 to Pause Search Service Application" -ForegroundColor Cyan
    Write-Host "Choose 2 to leave Search Service Application running" -ForegroundColor Cyan
    $searchappresult = Read-Host "Press 1 or 2 and hit enter" 
    Write-Host
   
   if($searchappresult -eq 1)
    {
        $srchctr = 2
        Write-Host "Pausing the Search Service Application" -foregroundcolor yellow
        Write-Host "This could take a few minutes" -ForegroundColor Yellow
        $ssa = get-spenterprisesearchserviceapplication
        $ssa.pause()
    }
   
    elseif($searchappresult -eq 2)
    {
        Write-Host "Continuing without pausing the Search Service Application"
    }
    else
    {
        Write-Host "Run the script again and choose option 1 or 2" -ForegroundColor Red
        Write-Host "Exiting Script" -ForegroundColor Red
        Return
    }
  }
Write-Host "Stopping Search Services if they are running" -foregroundcolor yellow
if($srv4.status -eq "Running")
  {
    $srch4srvctr = 2
    set-service -Name "OSearch15" -startuptype Disabled
    $srv4.stop()
  }
if($srv5.status -eq "Running")
  {
    $srch5srvctr = 2
    Set-service "SPSearchHostController" -startuptype Disabled
    $srv5.stop()
  }
do
  {
    $srv6 = get-service "SPSearchHostController"
    if($srv6.status -eq "Stopped")
    {
        $yes = 1
    }
    Start-Sleep -seconds 10
  }
  until ($yes -eq 1)
Write-Host "Search Services are stopped" -foregroundcolor Green
Write-Host

#######################
##Stop Other Services##
#######################
Set-Service -Name "IISADMIN" -startuptype Disabled
Set-Service -Name "SPTimerV4" -startuptype Disabled
Write-Host "Gracefully stopping IIS W3WP Processes" -foregroundcolor yellow
Write-Host
iisreset -stop -noforce
Write-Host "Stopping Services" -foregroundcolor yellow
Write-Host
$srv2 = get-service "SPTimerV4"
  if($srv2.status -eq "Running")
  {$srv2.stop()}
Write-Host "Services are Stopped" -ForegroundColor Green
Write-Host
Write-Host

##################
##Start patching##
##################
Write-Host "Patching now keep this PowerShell window open" -ForegroundColor Magenta
Write-Host
$starttime = Get-Date
$filename = $patchfile.basename
$arg = "/passive"
Start-Process $filename $arg
Start-Sleep -seconds 20
$proc = get-process $filename
$proc.WaitForExit()
$finishtime = get-date
Write-Host
Write-Host "Patch installation complete" -foregroundcolor green
Write-Host

##################
##Start Services##
##################
Write-Host "Starting Services Backup" -foregroundcolor yellow
Set-Service -Name "SPTimerV4" -startuptype Automatic
Set-Service -Name "IISADMIN" -startuptype Automatic
##Grabbing local server and starting services##
$servername = hostname
$server = get-spserver $servername
$srv2 = get-service "SPTimerV4"
$srv2.start()
$srv3 = get-service "IISADMIN"
$srv3.start()
$srv4 = get-service "OSearch15"
$srv5 = get-service "SPSearchHostController"
###Ensuring Search Services were stopped by script before Starting"
if($srch4srvctr -eq 2)
{
    set-service -Name "OSearch15" -startuptype Automatic
    $srv4.start()
}
if($srch5srvctr -eq 2)
{
    Set-service "SPSearchHostController" -startuptype Automatic
    $srv5.start()
}
###Resuming Search Service Application if paused###
if($srchctr -eq 2)
{
    Write-Host "Resuming the Search Service Application" -foregroundcolor yellow
    $ssa = get-spenterprisesearchserviceapplication
    $ssa.resume()
}
Write-Host "Services are Started" -foregroundcolor green
Write-Host
Write-Host
Write-Host "Script Duration" -foregroundcolor yellow
Write-Host "Started: " $starttime -foregroundcolor yellow
Write-Host "Finished: " $finishtime -foregroundcolor yellow
Write-Host "Script Complete" 


Ref : http://blogs.msdn.com/b/russmax/archive/2013/04/01/why-sharepoint-2013-cumulative-update-takes-5-hours-to-install.aspx
Thursday, October 2, 2014

Uploading Large Files in sharepoint 2013/2010/2007

  • Change the maximum upload size on the web application level


  • Central Admin>Application Management>Manage Web Applications> Select the desired web app and click General Settings on the ribbon


  • Modify the web.config file for the appropriate web application, this is located by default at C:\inetpub\wwwroot\wss\VirtualDirectories\web application name or port

      • Make a backup copy of the web.config, then open it
      • Do a Ctrl+f to find this element 


    <httpRuntime maxRequestLength="51200" requestValidationMode="2.0" />


    Modify the above element to match the following

    <httpRuntime executionTimeout="999999" maxRequestLength="2048000" requestValidationMode="2.0" />

    In the above step we added executionTimeout="999999" and we set the maxRequestLength to what we set the maximum upload size on the web application general settings, which is 2048000 (2000mb * 1024 = 2048000)


    Ref Links :


    http://blogs.technet.com/b/sammykailini/archive/2013/11/06/how-to-increase-the-maximum-upload-size-in-sharepoint-2013.aspx


    http://blogs.technet.com/b/praveenh/archive/2012/11/16/issues-with-uploading-large-documents-on-document-library-wss-3-0-amp-moss-2007.aspx